Installing the QT and OPENCV libraries and setting up the build environment in QTCreator#
Install QT and OPENCV libraries#
- After the Petalinux project is compiled, execute the command:
petalinux-build --sdk以获得sdk.sh. Compiling the SDK. H is time-consuming. You can download what we have compiled sdk.sh.Copy the SDK. Sh to the Ubuntu system where QTCreator is located, open the terminal in the path where the SDK. Sh is located, and execute the command:chmod +x./sdk.sh &&./sdk.sh
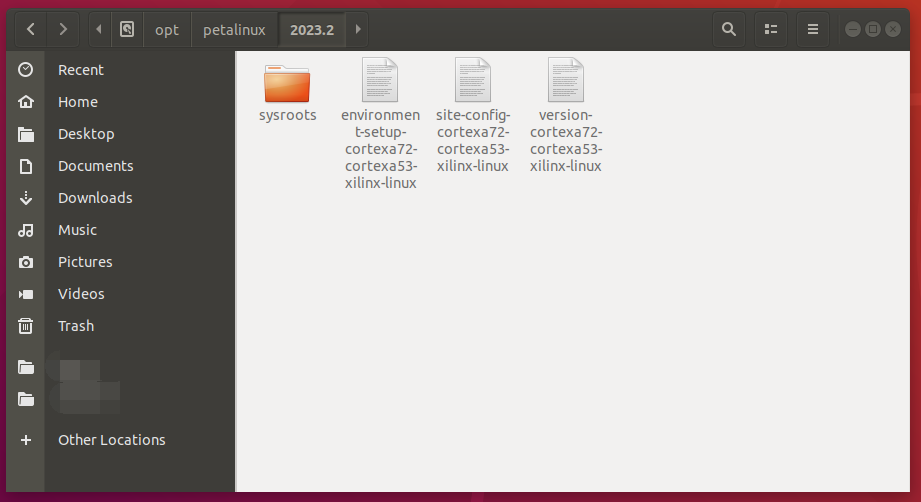
- Prompt to enter the installation path, here I use the default path to install, after the installation is completed, you can see these files in the corresponding path:
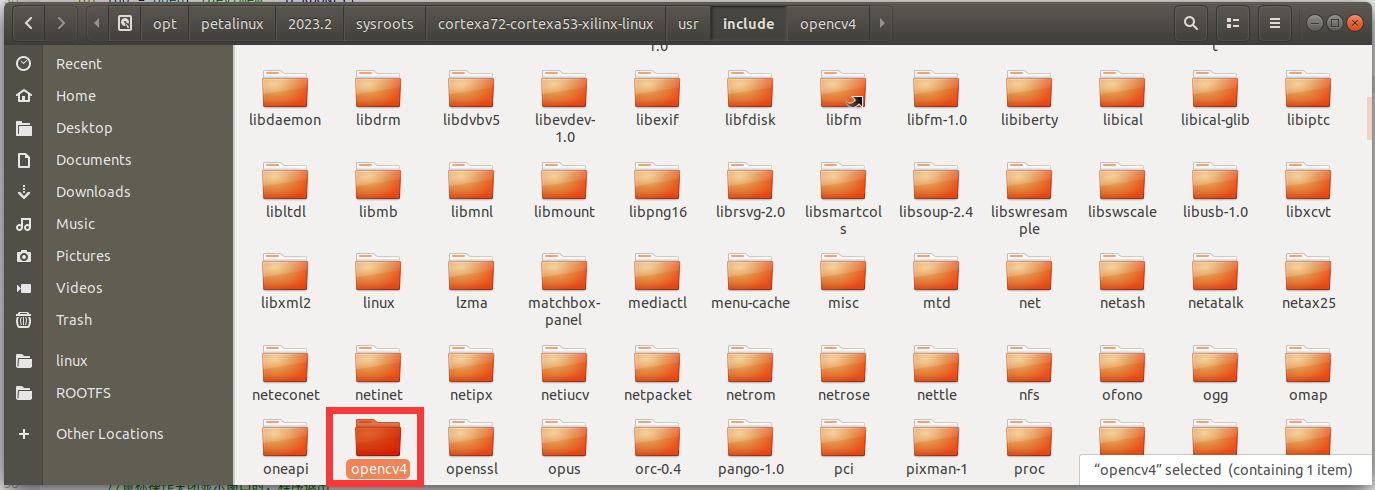
- Unzip demo/course_s2/libs/opencv4_include.tar.gz and recursively replace the folder of the same name in the path shown in the following figure with the opencv4 folder obtained by unzipping:
Set the compilation environment in QTCreator#
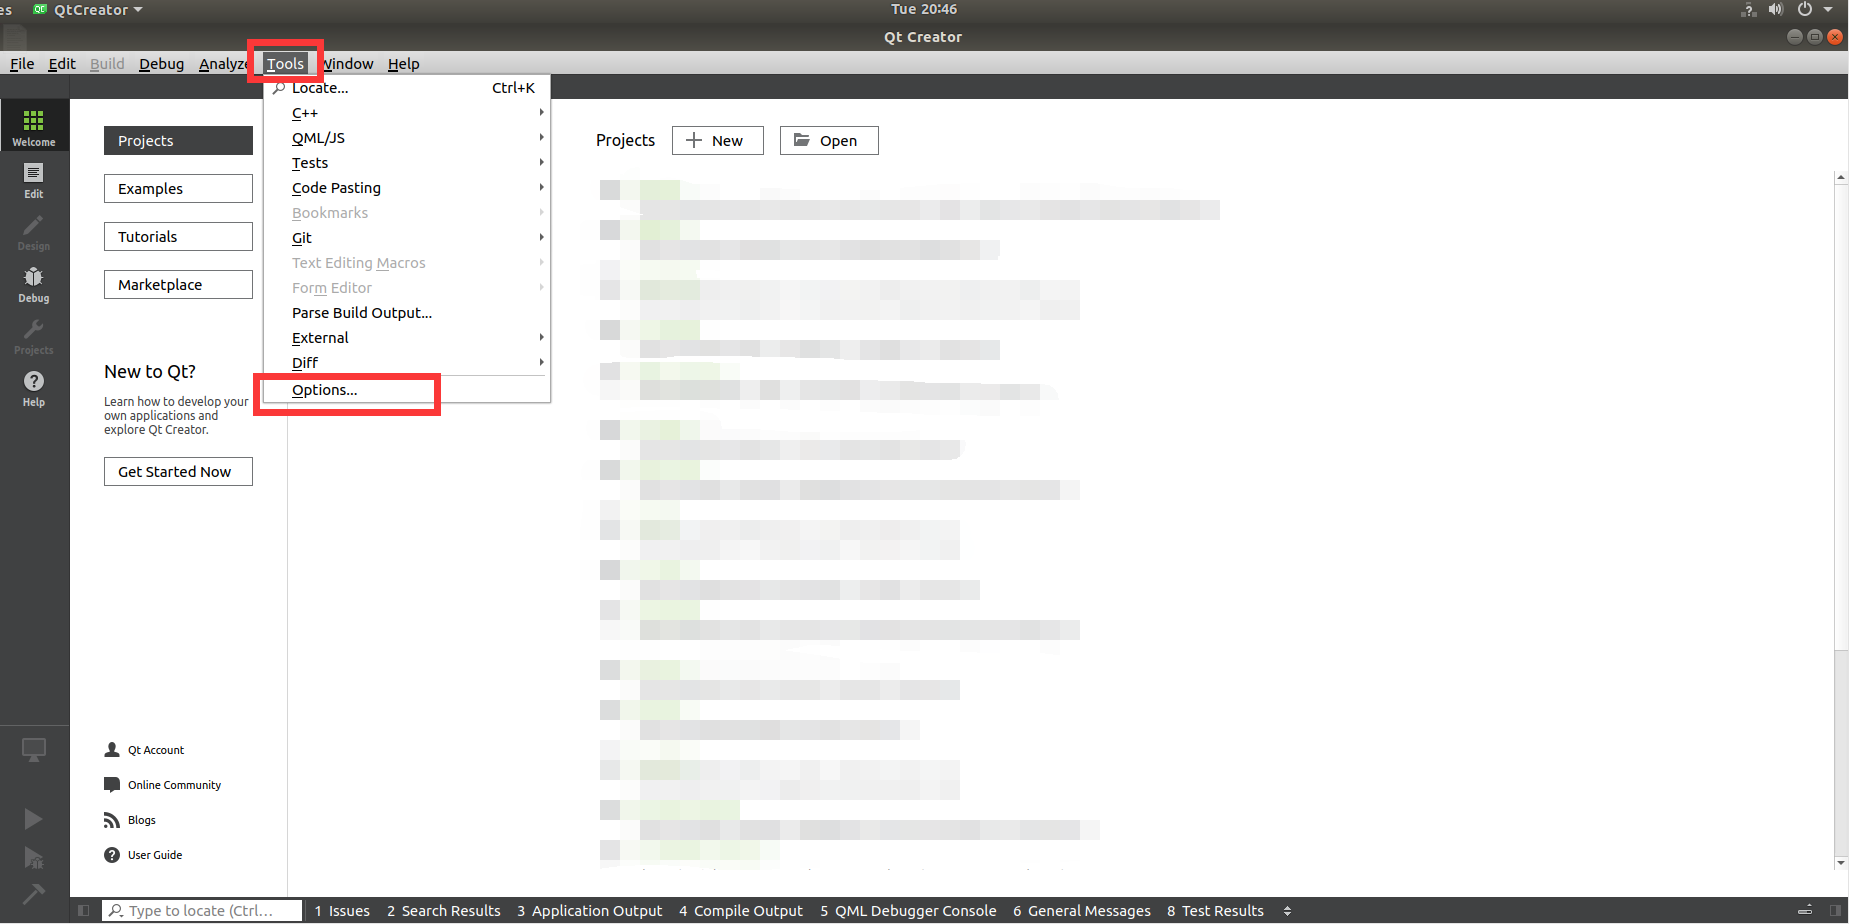
- Open QTCreator, click Tools in the upper menu bar, and select Options:
- Add a Kits using the library from the previously installed SDK. Sh:
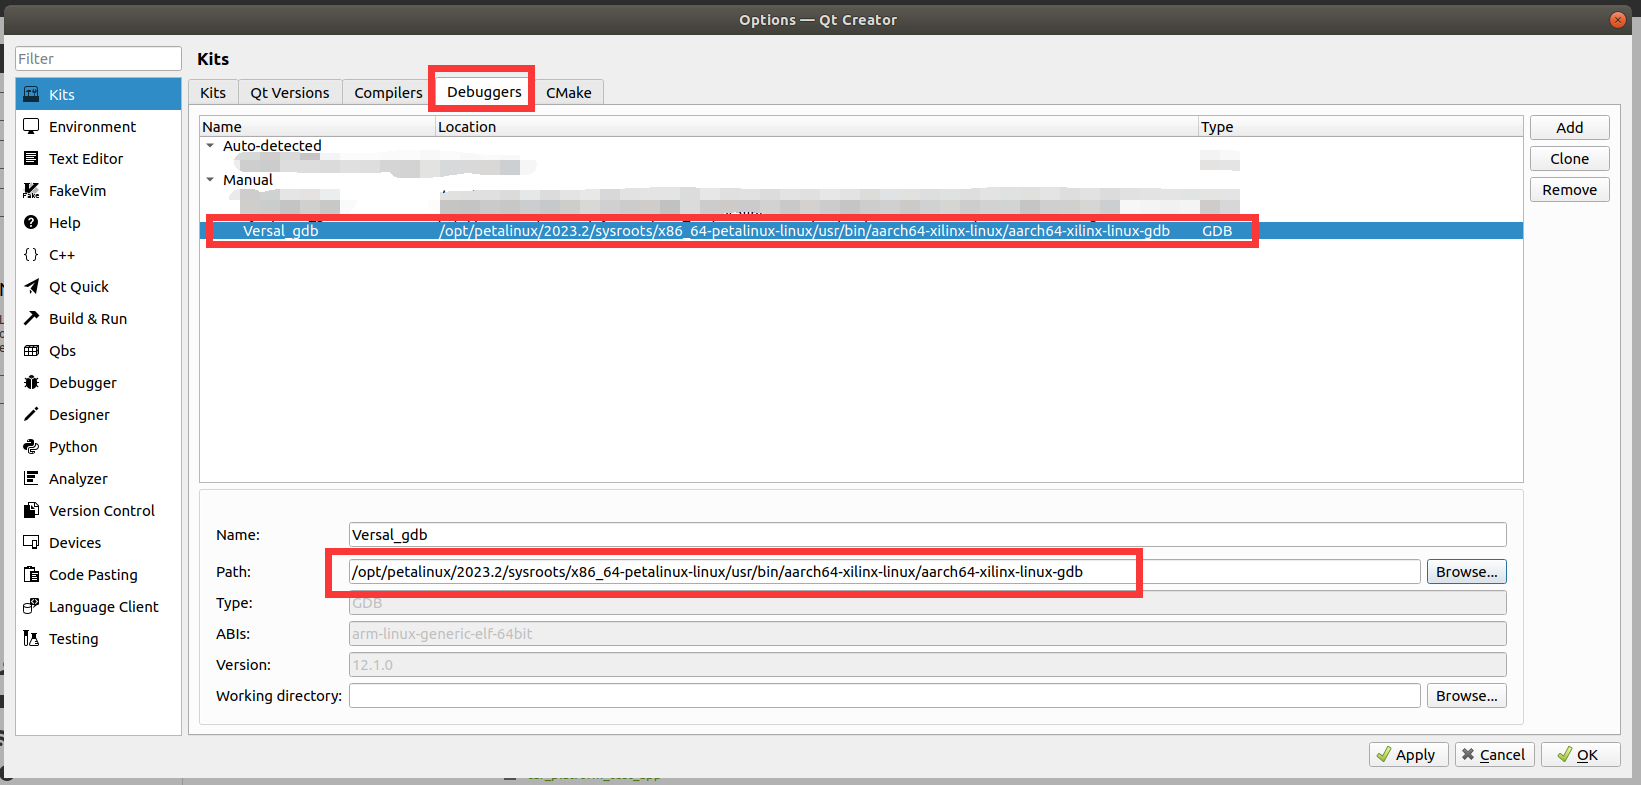
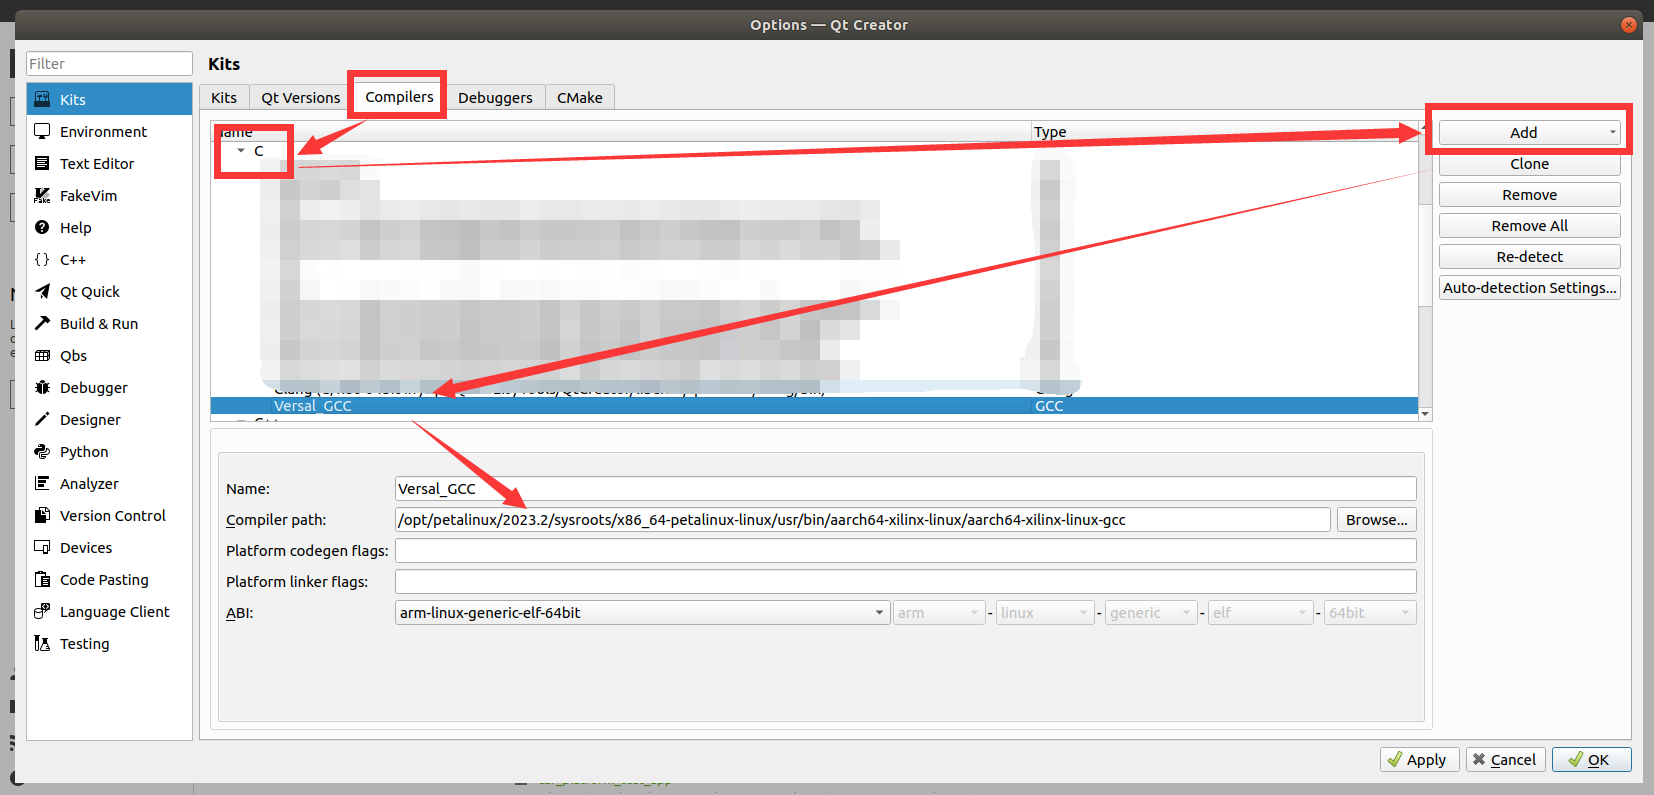
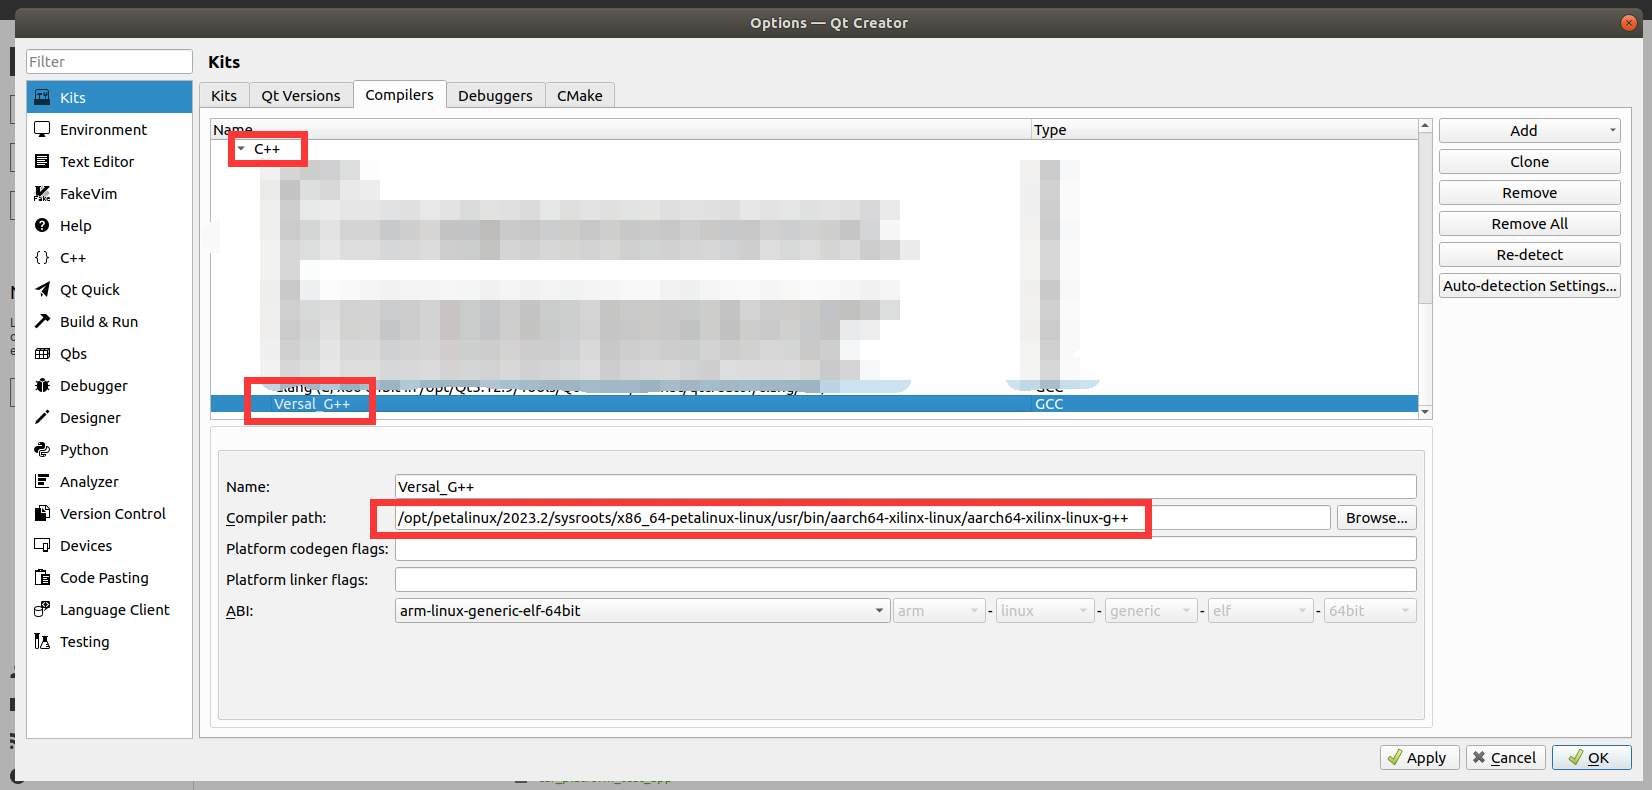
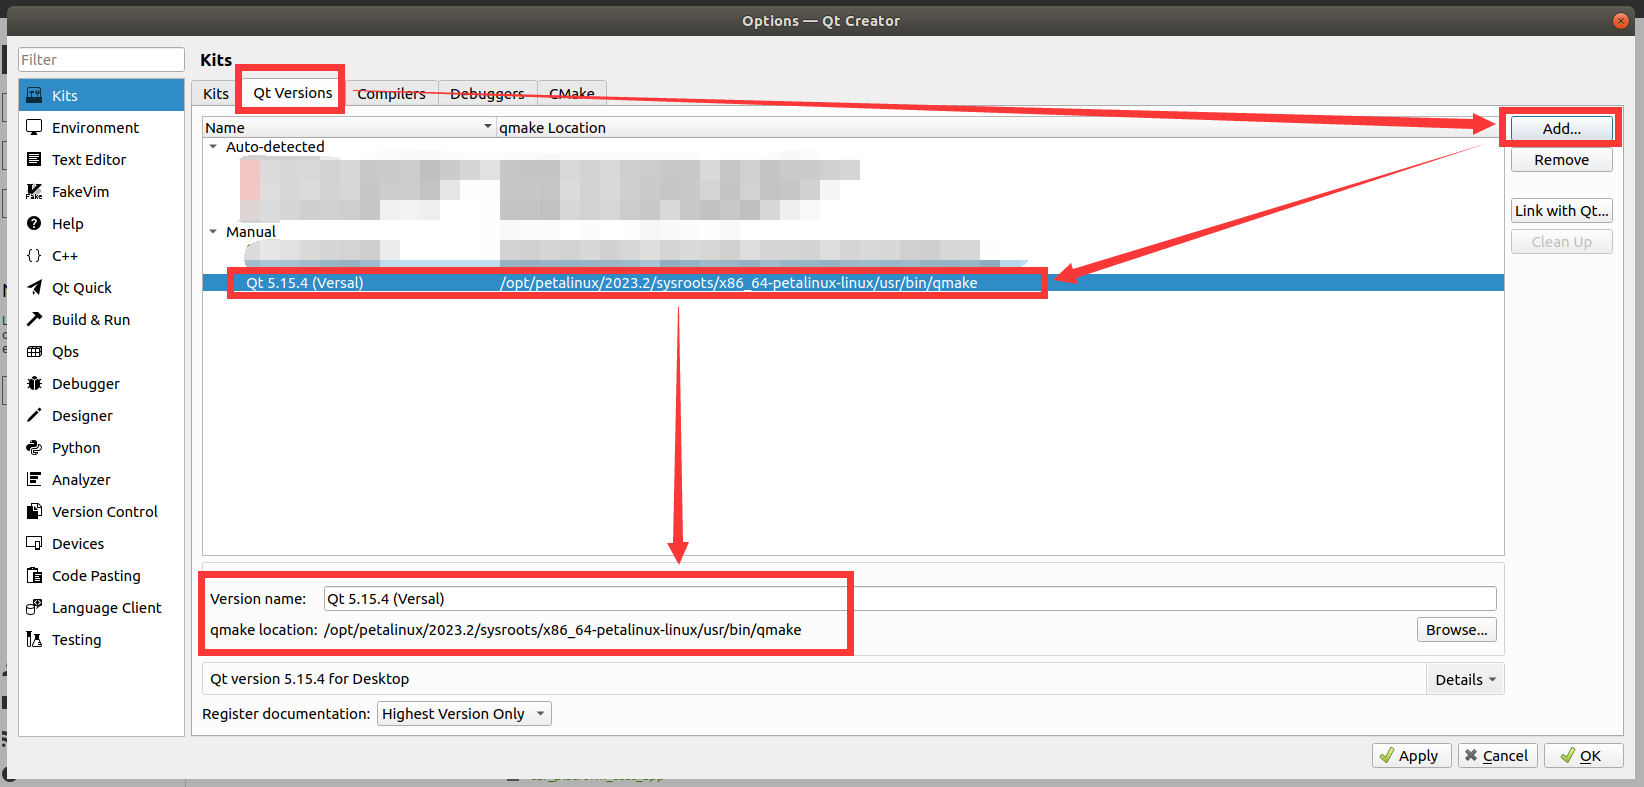
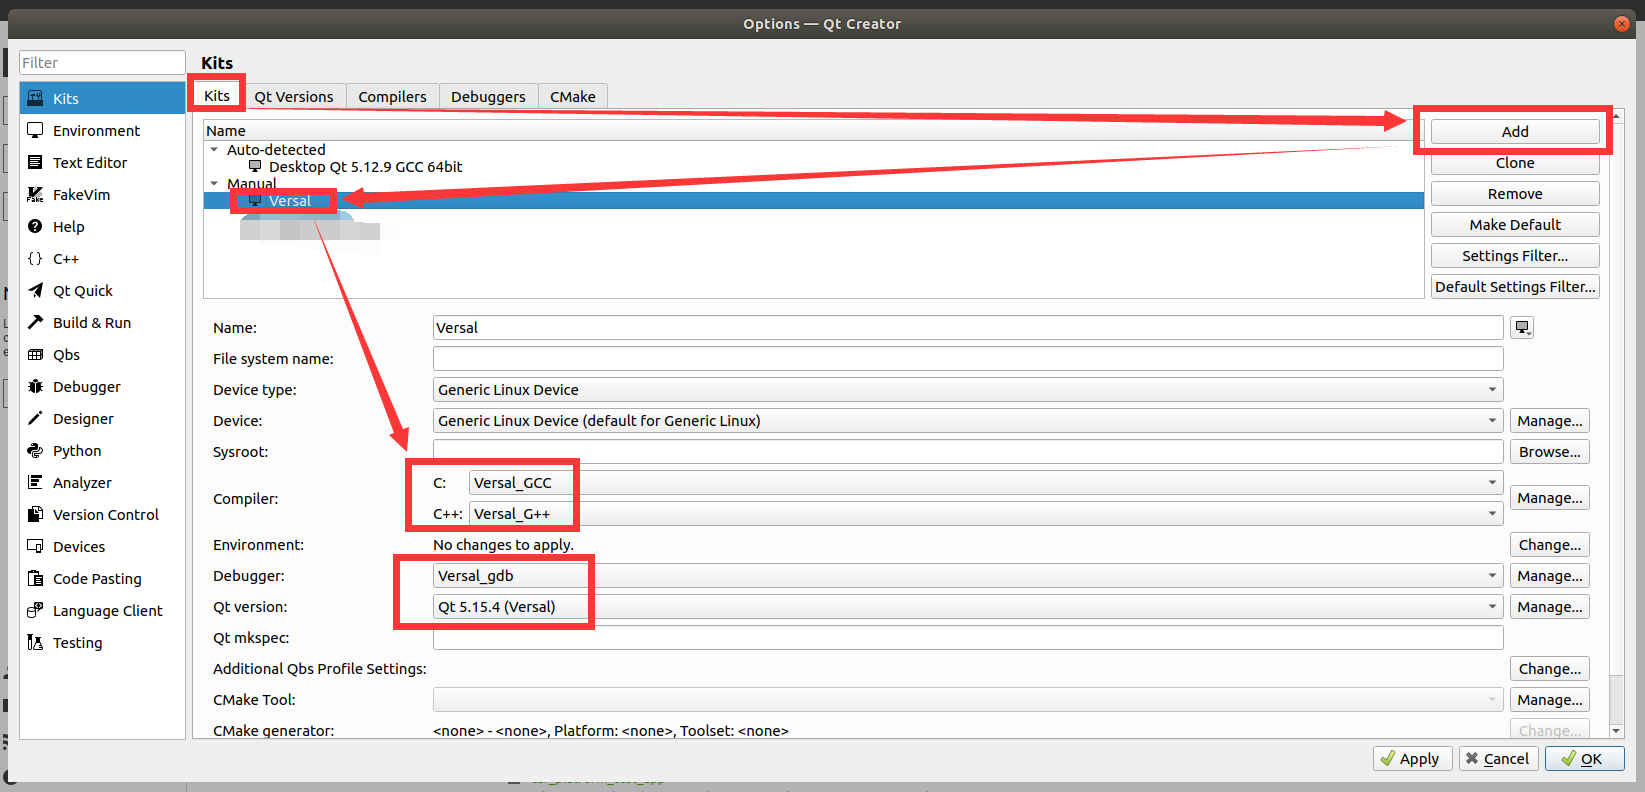 Click OK to save the settings.
 - Open a QT project, for demo/course_s2/applications/qtProject/mipi_camera example:
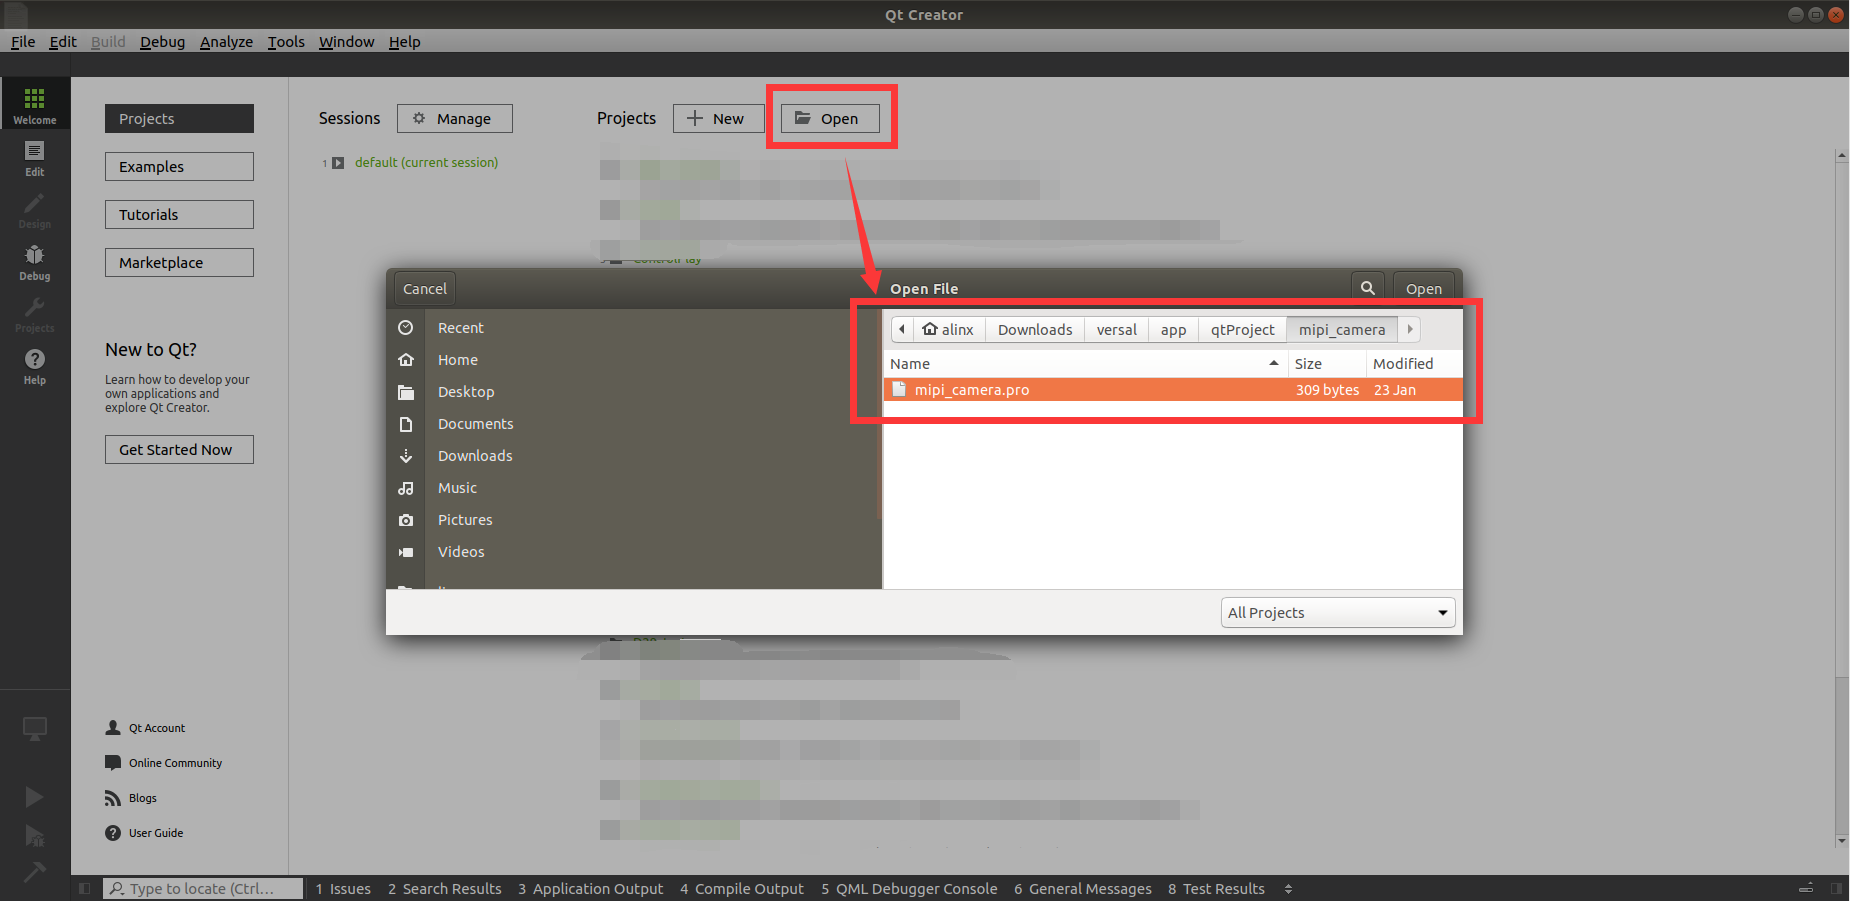
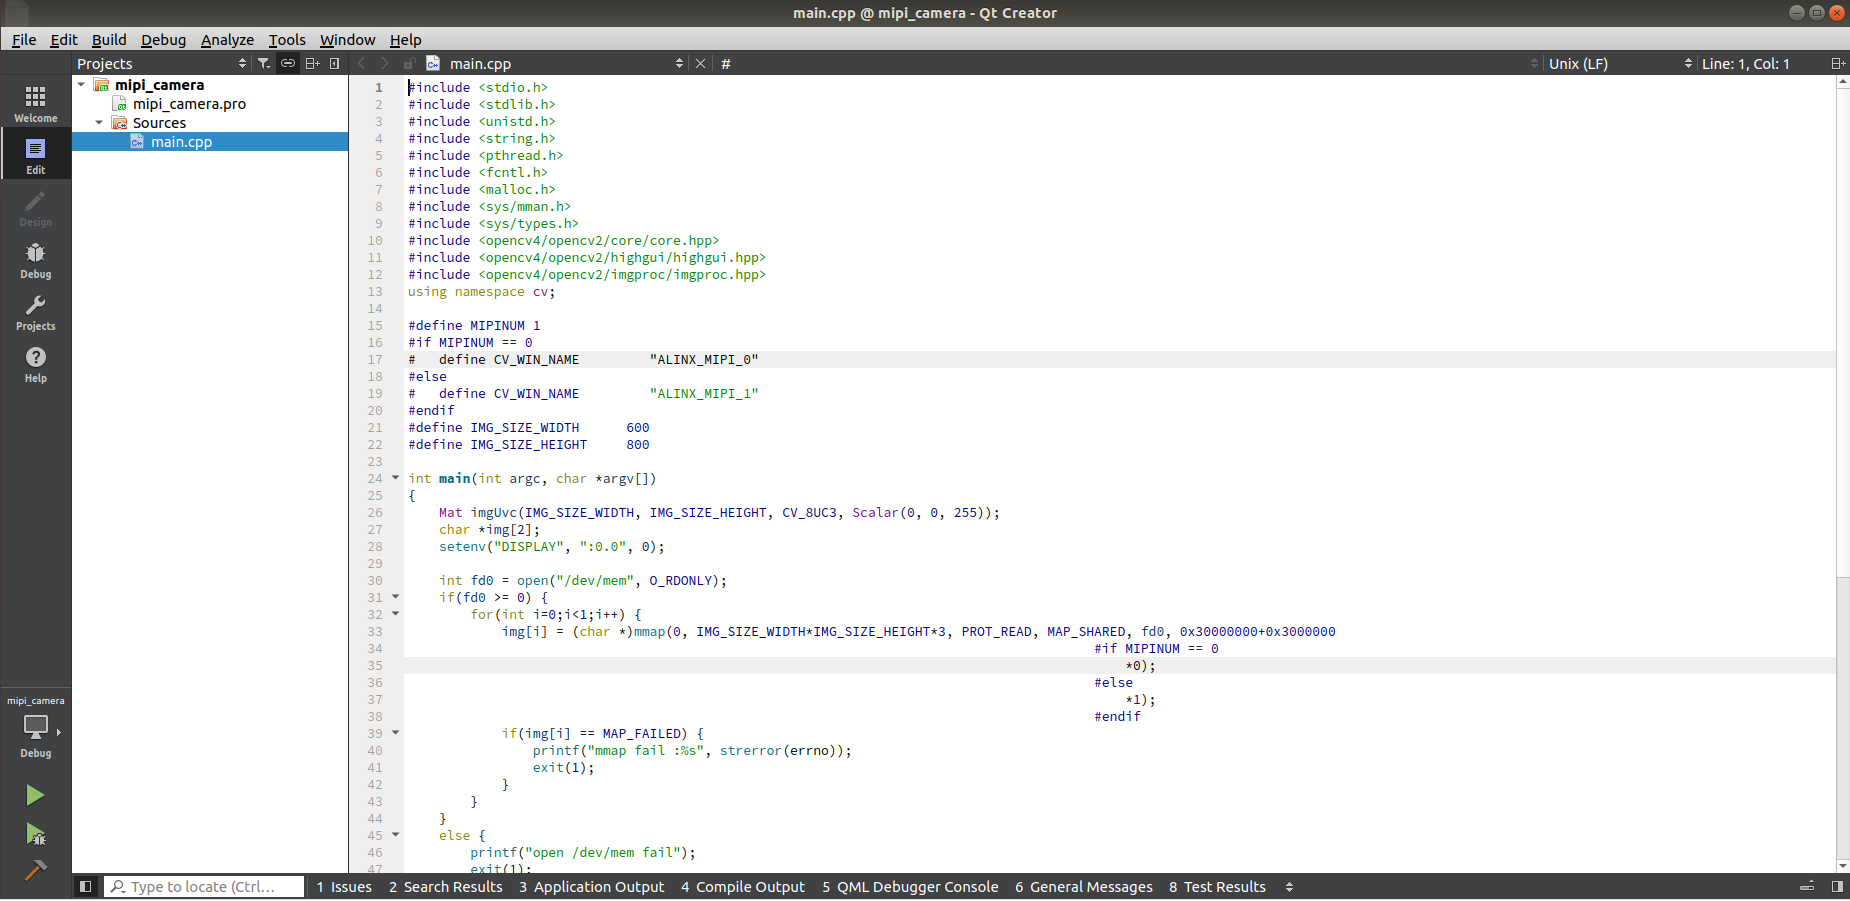
- Select Versal Kits to compile:
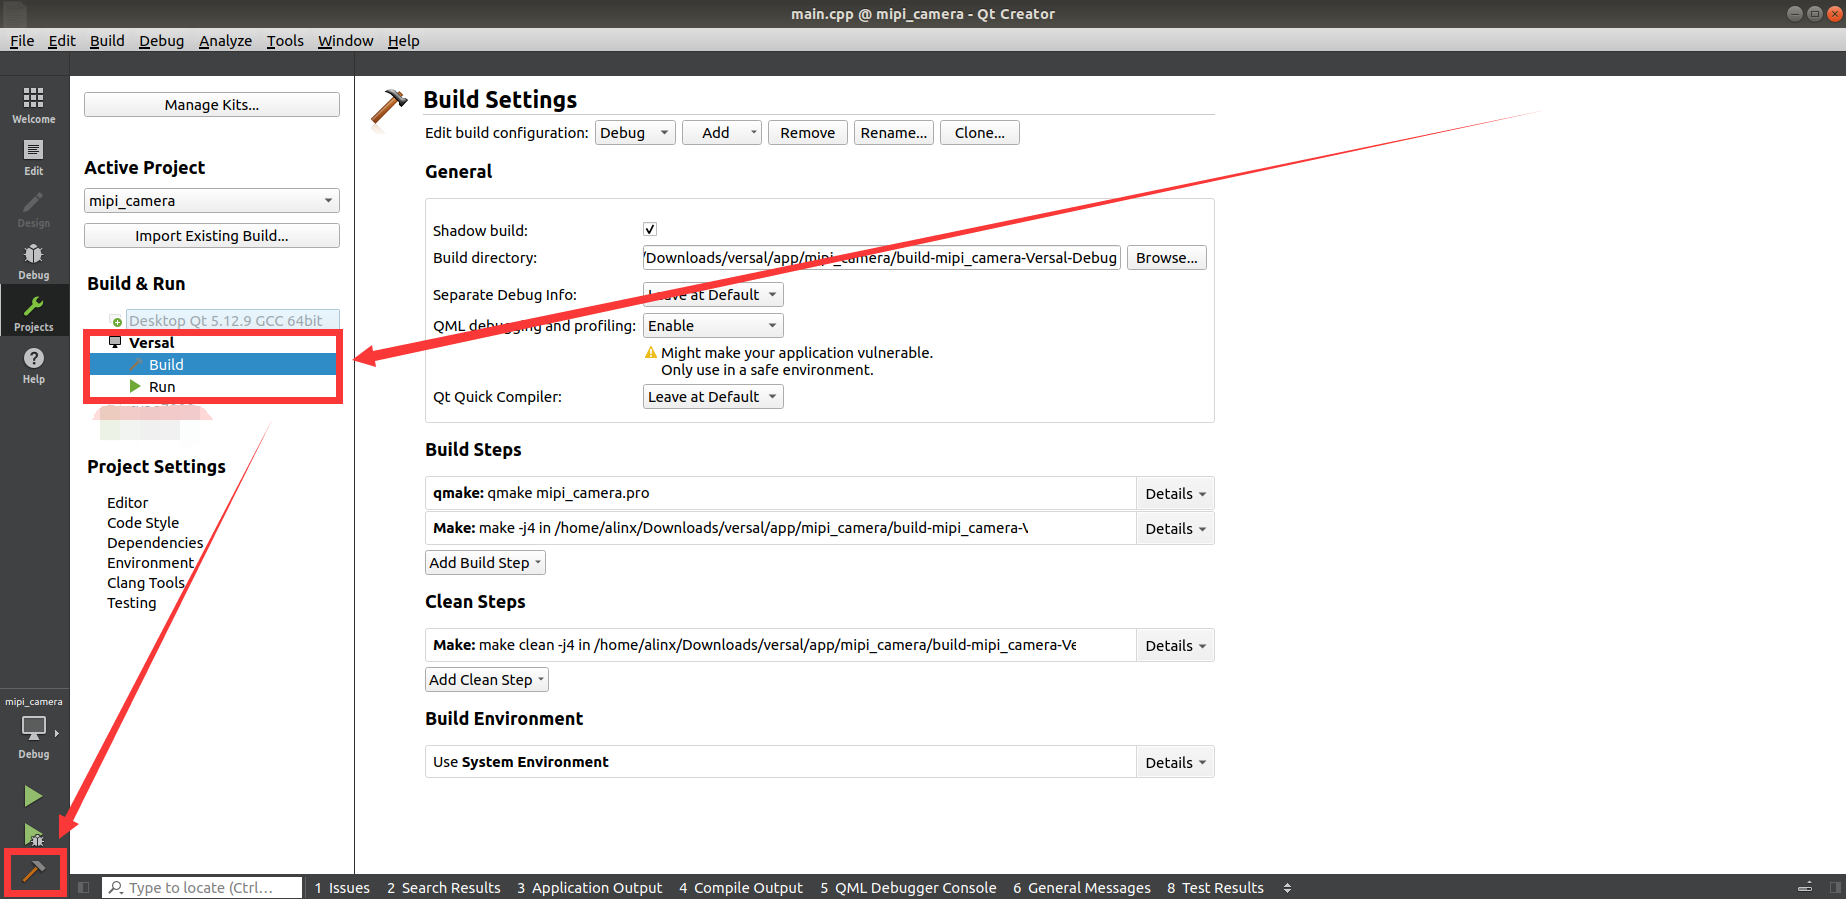
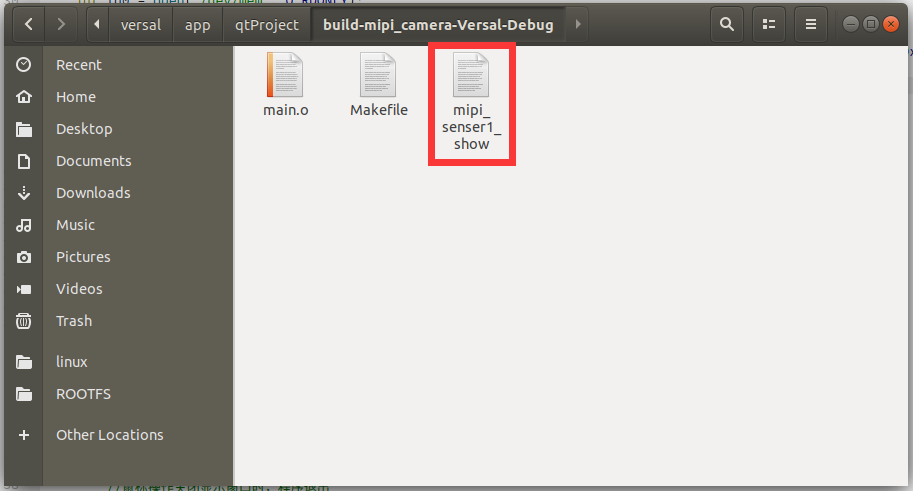
- The executable file can be seen in the compilation result path.